Leyland P76 Owners 2006 |
Technical |

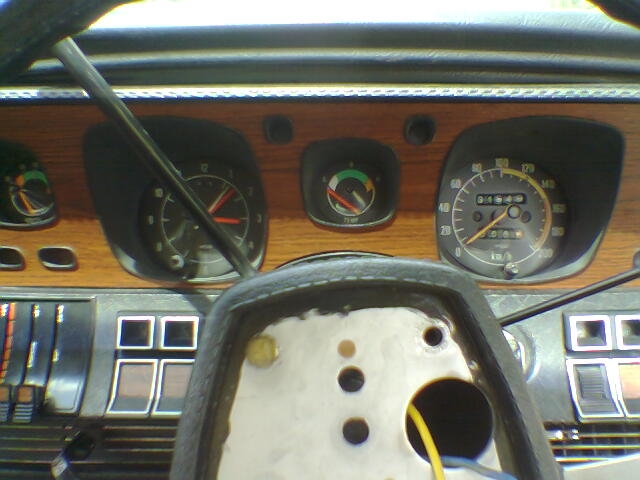
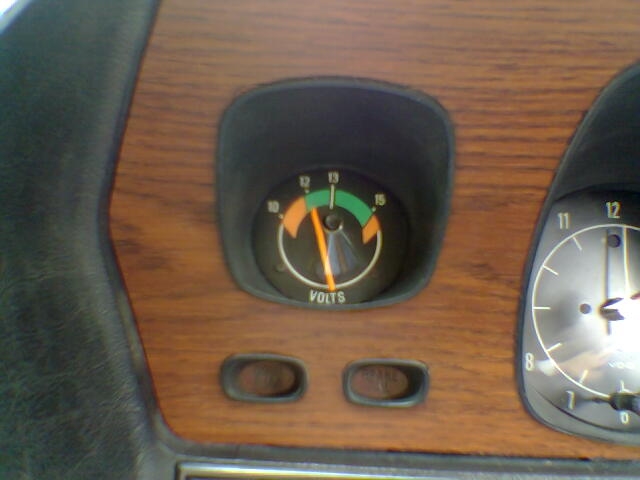
Dash Wood Grain - New Vinyl
By Scott Reynolds Vic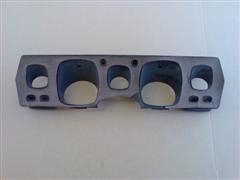
- Over 4 years have passed since I renewed the dreaded wood grain on the P’s dash and it hasn’t lifted, curled, shrunk, fallen off, faded or anything else that the original wood grain was notorious for.
- I’ve seen some rather interesting alternatives for the dash wood grain from stripping it and not replacing it, to replacing it with marine ply with holes cut in it loosely matching up with the instruments and warning lights and held on with a few big self tapping screws!
- I first attempted to re-stick the original material. I ironed the piece from the left of the glove box between 2 sheets of brown paper then sat it on glass under two heavy books for a week until it became flat again, but it had shrunk too much to re-use. I had to think of an alternative product.
- My first idea was to use a good quality ‘sign writing’ vinyl in a similar wood grain finish however there was only one wood grain pattern available and that had no texture to it and the colour was way off. I didn’t want to settle for household contact, I knew that just wouldn’t last, so my search continued.
- I recalled a visit from a Rep who came into my shop quite some time ago. She was selling a self adhesive vinyl, claiming it was much better than contact. Now where did I file that information???
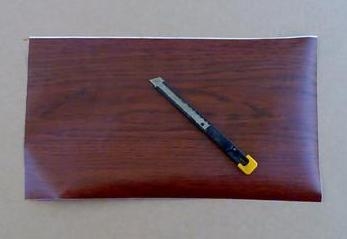
- I searched to no avail. I must have binned it – after all this was in my pre-P days. I did remember the name of the product she was selling and managed to find it at the local hardware store. They had a range of about 12 colours in stock but in wood grain they only had pine and walnut I think. I had my ironed sample with me (which had re-curled from sitting in the centre console of the car) and flicking through the brochure, I found a colour really close to original with a very similar texture. It is considerably thinner than the original wood grain but I can live with that. The product I used was called Alkor and the colour was reddish oak, they have a few different types of vinyl, I can't remember the product code of the item I used. The main benefit of this product over any others that I know of is its initial low adhesion which allows for any repositioning before the full adhesion takes place in about an hours time.
- How much to get? Two metres at 450mm wide sounded about right, allowing for failure on first attempt. Slight problem, they couldn’t order just two metres, it had to be the full 15 metre roll. What would I do with that much of it? Fortunately I know the manager of their paint department and he ordered the full roll in, sold me my two metres, and put the rest into stock. He later told me that he had blown his monthly budget on getting the roll! Oh well, it was for a good cause. That Mitre 10 then became a Bunnings and product was not on their 'to keep' list, so I have no idea what happened to the remaining 13 metres.
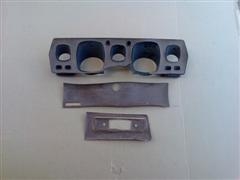
- Now the fun part! With the instrument cluster, glove box door, radio fascia panel, switches and heater knobs out of the car it was time to remove all traces of the original wood grain and any residual adhesive. A product called ‘Tardis’ is great for removing contact adhesive and worked brilliantly (My panel beater calls it Dr. Who). White spirits will do a similar job.
- I decided to start from the left side of the car and tackle the instrument cluster last. I was dreading the thought of it! I cut a small piece of the new vinyl and started experimenting. It was working nicely so time to put some on. I started with the small panel to the left of the glove box - not too difficult a piece to begin with. After measuring everything twice and then re-measuring twice, I intentionally cut the first piece over length by about 20mm. Using the small lip that is against the glove box opening as a starting point, I began sticking the vinyl on, working it towards the other end where I had left it oversize, pressing it firmly down and working it into the rounded corners so that the excess was sticking straight out. Looking good already!
- With a fresh 9mm snap blade knife I carefully and slowly cut the vinyl using the angles of the dash as a guide for the blade and removed the excess. Wow, that was easy! Next was the panel that the radio mounts through (not the radio fascia panel). Same principal as my first piece, I worked from the edge against the glove box towards the instrument cluster keeping the bottom edge nice and straight. With no radio in the way all was going well until I got to the top right corner of the panel… it kept on creasing. Grrrrrrrrr! Needless to say I screwed that piece up and when I finally got it unstuck from my fingers, hurled it somewhere across the shed. I tried again with a fresh cut of vinyl with the same result, except it took me longer to get it off my fingers. Starting again, this time from the instruments end and working towards the glove box, the same happened, creasing in the top left! Another piece screwed up and thrown to the floor! Eventually I was able to stretch a piece into that top right corner fairly effectively.
- I have since redone this section as the vinyl had returned to its pre-stretched size. I resolved this by cutting the vinyl at the top right of the radio opening and overlapping the edges.
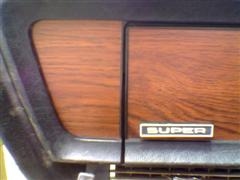
- The glove box door was fairly easy being a big rectangle although it didn’t help that the ‘super’ badge on ours is slightly out of alignment with its base. I overcame this problem fairly quickly without any more bits ending up on the shed floor. The radio fascia, switches and heater control knobs were all easy.
- All that’s left now is the instrument cluster. I tried using a low tack spray mask vinyl to make a template,
- that ended up somewhere near the other pieces of screwed up vinyl. It was time to rethink…
- I thought about using the damaged original vinyl from my spare housing as a template to cut the replacement from, but then thought some more and decided that would be too hard to align, and too hard to replicate where some pieces were missing…
- With plenty of the new woodgrain at hand, I had a brainwave and made a start. I cleared some more room on the bench, adjusted my swivel chair, a fresh end on my knife, and a strong coffee I began experimenting with success.
- With the instrument cluster devoid of all its original material and its aftermarket adhesives, I cut a piece of vinyl that completely covered it, allowing an overlap on all sides. Starting at the top of the cluster I began to stick the full sheet of woodgrain to it, working it down over the entire housing ensuring that it was well stuck to the edges of the instrument openings and warning lights, time to make the first incision. With blade in hand I made the first cut around a warning light, stopping part way through the cut on a few occasions to re-position the housing, ensuring the blade followed the outer edge of the lip, until I had gone all around it, then using the corner of my blade I lifted the cut-out piece off the top, pressed the woodgrain firmly down around the lip and moved to the next. The remainder of the housing was done the same way, snapping the blade to a fresh one as soon as it started to show the slightest sign of dragging. With all the cuts done on the housing all I needed to do was trim up the edges, sides first then top and bottom, put the gauges back in and re-install into the car.
This site is hosted on
Freeservers Reliable, Free Web Hosting |
Last updated April, 2010 |
This web site may contain Copyright material If you find any problems with the site, please email the Web Editor  |